
This post may contain affiliate links. Please see our disclosure policy.
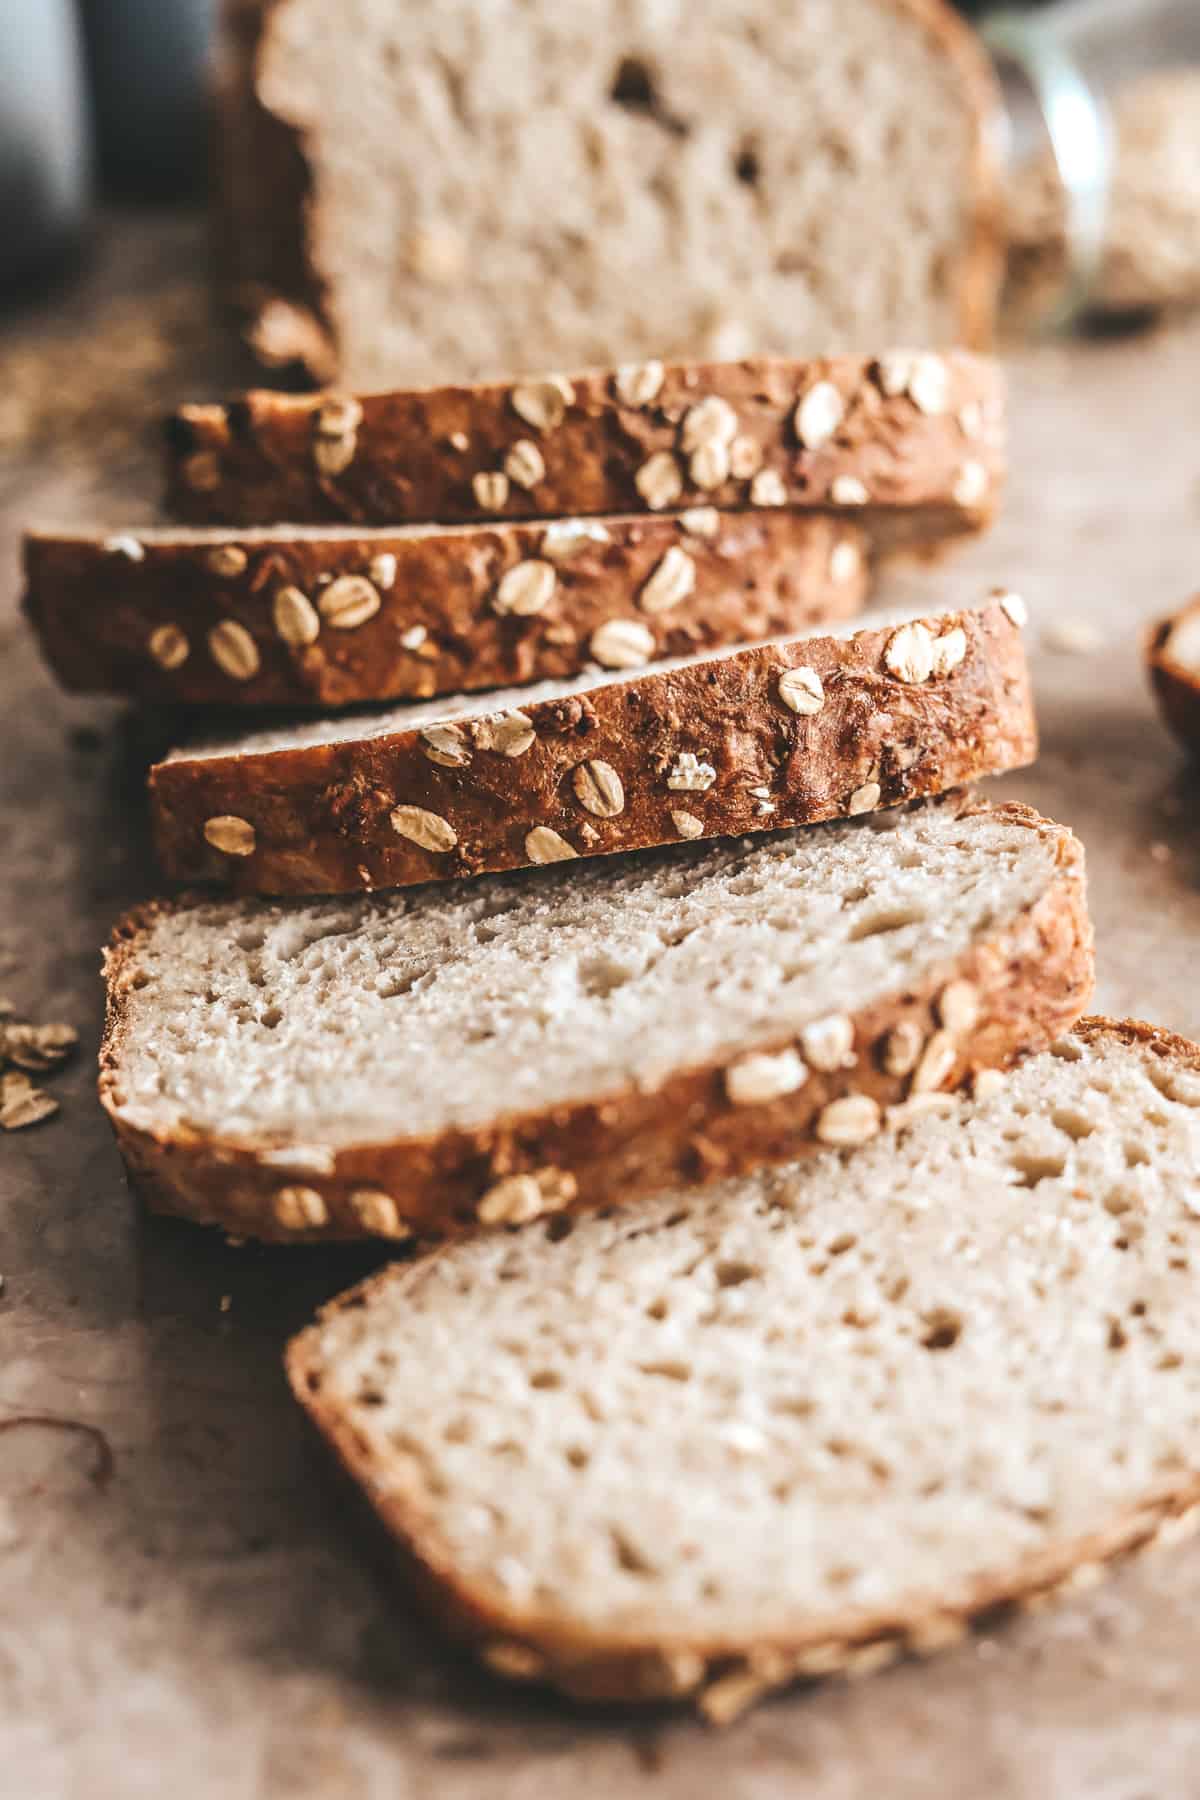
This Homemade Honey Oat Bread recipe has been one of my most popular recipes for years. It’s soft and fluffy, lightly sweet with a honey butter swirl throughout! If you’re new to baking bread, this is a beginner-friendly recipe that’s great for toast and sandwiches, and so much better than store-bought bread!
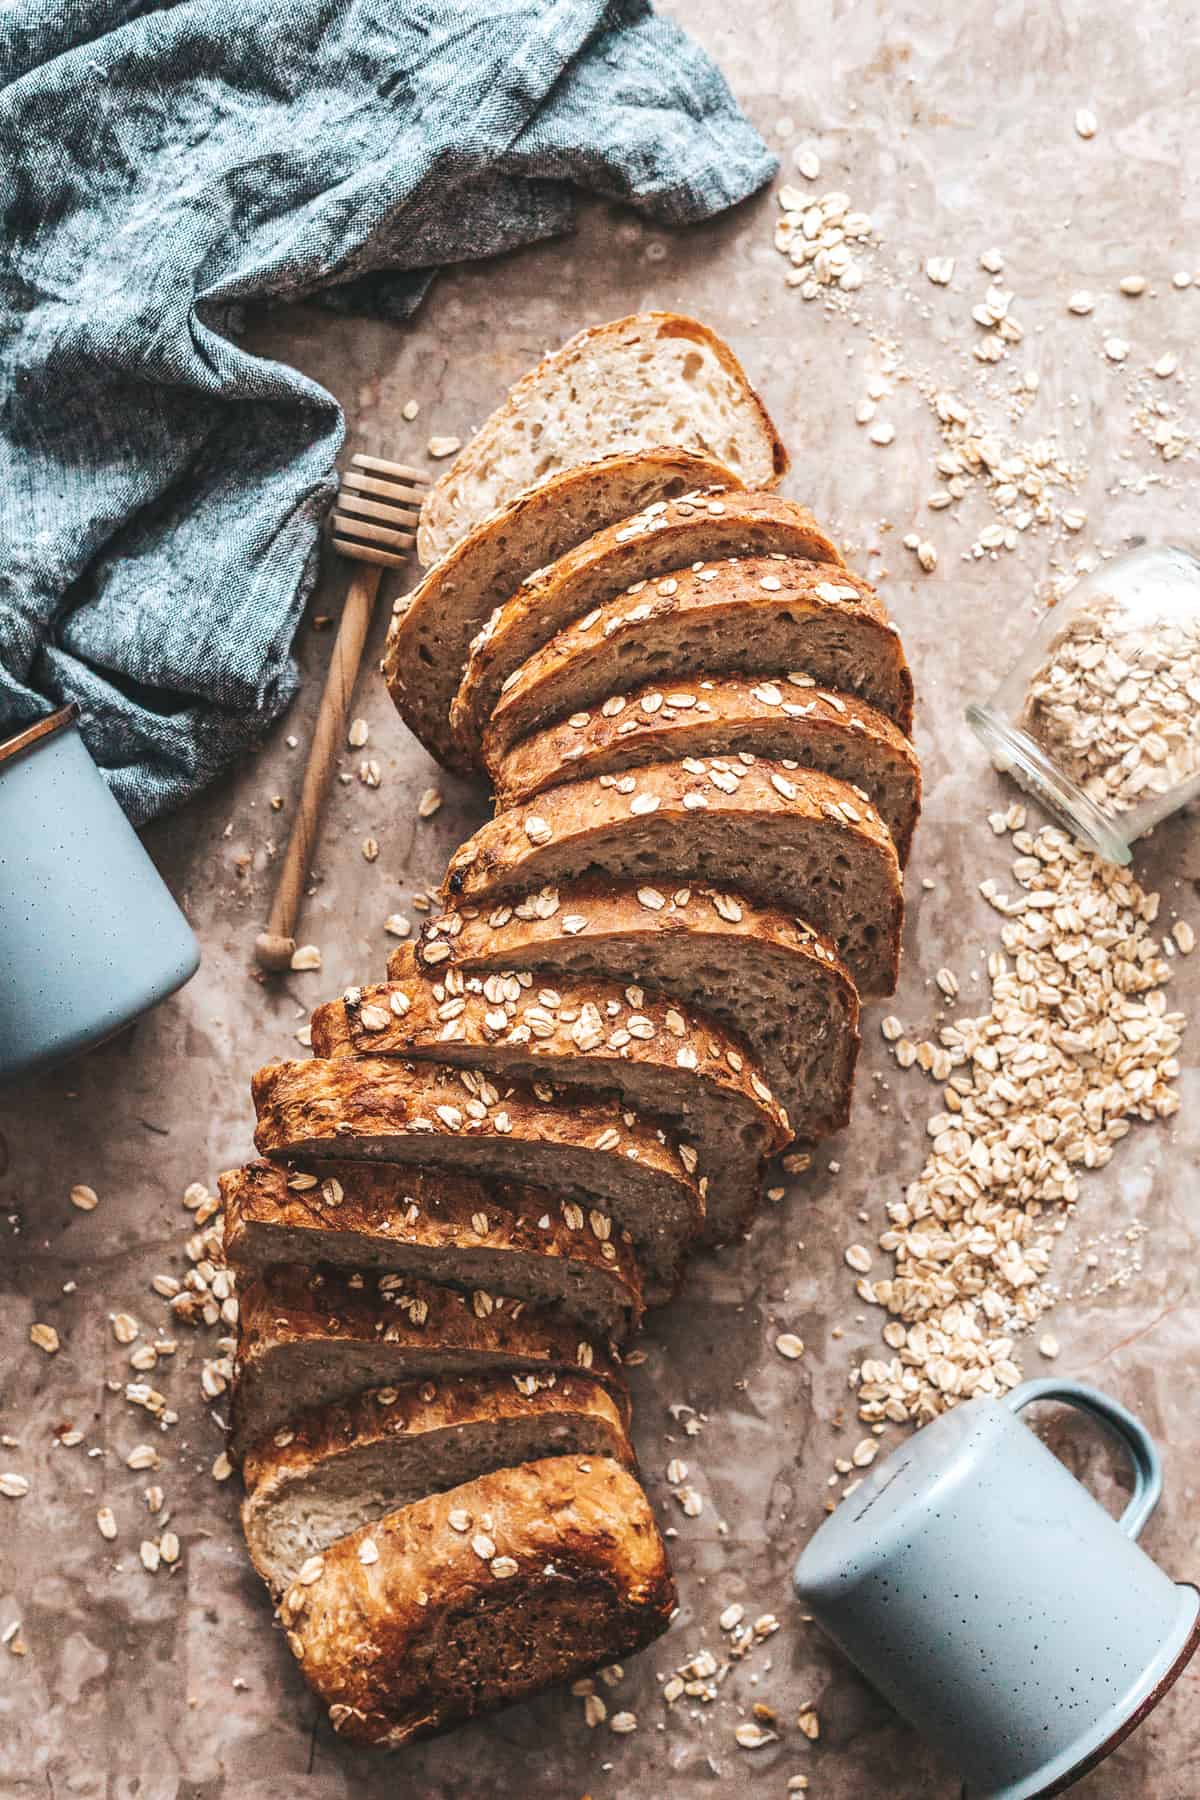
There is nothing, and I mean nothing, like fresh bread coming out of the oven. Add a little butter on top and it’s enough to cure a bad day or curate the perfect morning. Whenever I make homemade bread, it gets devoured within a day. This recipe is everyone’s favorite and let me tell you why.
Honey Oat Bread 🍯
- Honey butter swirled inside and on top of the loaf: The honey butter adds buttery honey flavor throughout the loaf without making the bread overly sweet.
- Soft, fluffy texture: This bread bakes up tender and pillowy because I use buttermilk instead of water. The acids/enzymes tenderize the gluten making it super soft!
- Subtle sweetness: The taste of this bread gives just enough sweetness to feel cozy and flavorful, but not so much that it tastes like dessert.
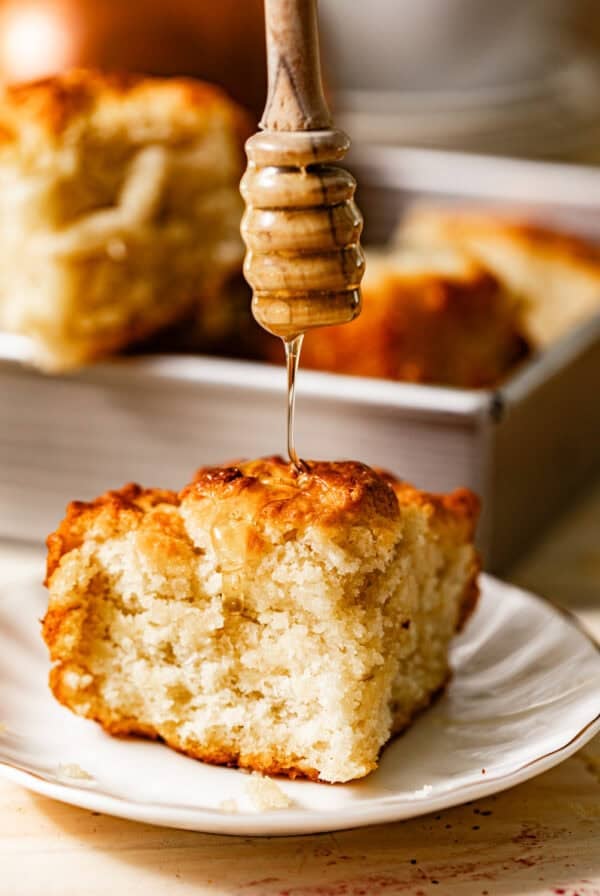
For more cozy homemade recipes, make my old fashioned buttermilk biscuits and apple streusel bread next!
Ingredients Overview
(full list of ingredients can be found in the recipe card below)
- Buttermilk adds tenderness and a subtle tang. The acidity also helps soften the gluten structure, giving the bread a softer crumb.
- All-Purpose Flour provides the structure. Its protein content creates enough gluten to help the bread rise while still keeping the loaf soft and fluffy.
- Honey adds gentle sweetness, moisture, and flavor. Honey is hygroscopic, which means it holds onto moisture and helps keep the bread soft longer.
- Nutmeg adds a warm background flavor. You only need a pinch!
- Active Dry Yeast helps the dough rise by feeding on sugars and producing carbon dioxide, which creates air pockets and gives the bread its fluffy texture. You can use instant yeast if that’s what you have on land.
- Rolled Oats add heartiness, texture, and a slightly nutty flavor. For best results, avoid instant oats/quick oats, they can make the bread chewy.
- Salted Butter adds richness, flavor, and tenderness. Unlike with my butter swim biscuits, you want to use room temperature butter to incorporate more air into the dough.
How To Make Honey Oat Bread
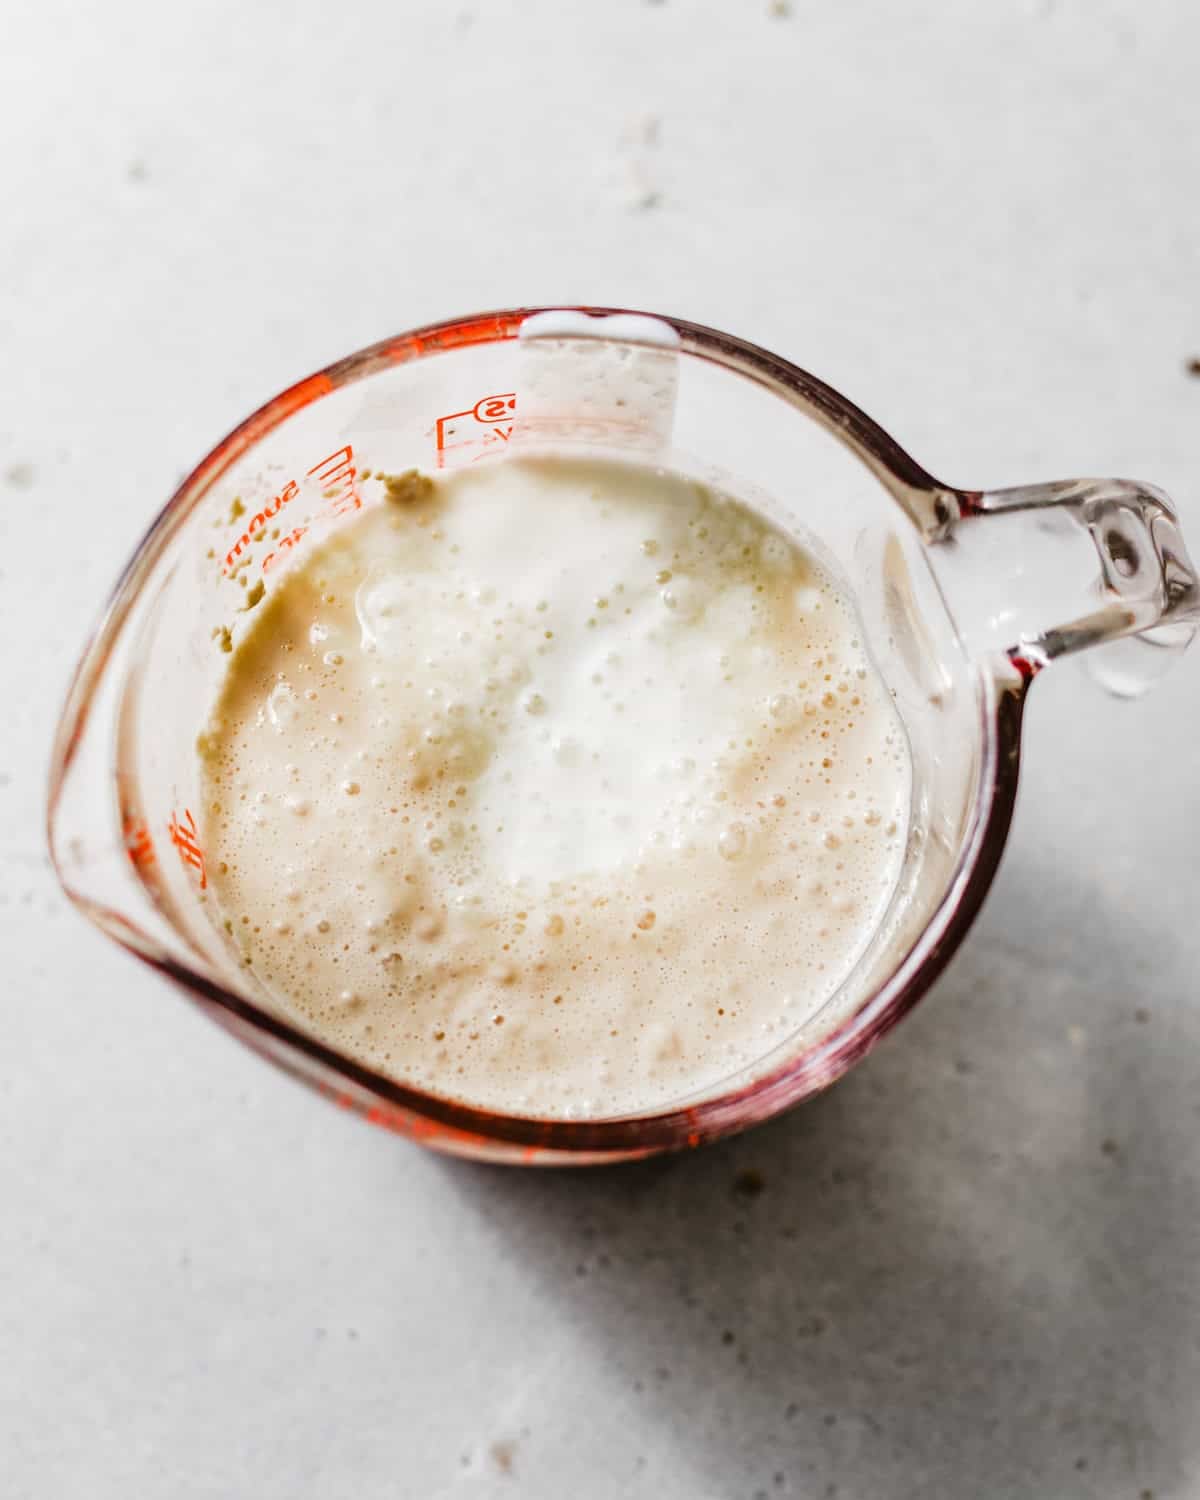
Step 1: Start by combining warm water and active dry yeast in a small bowl. Let the mixture sit until it becomes foamy. This tells you the yeast is active and ready to help the bread rise. Once foamy, add buttermilk and honey and stir together.

Step 2: In the bowl of a stand mixer, add dry ingredients. Whisk together and pour in the milk mixture and mix until just combined. Add the dough hook attachment and knead the dough until it becomes smooth, and slightly tacky. Place the dough in a lightly greased bowl, cover it, and let it rise until doubled in size. This first rise helps build structure and flavor. This first rise helps build structure and flavor.
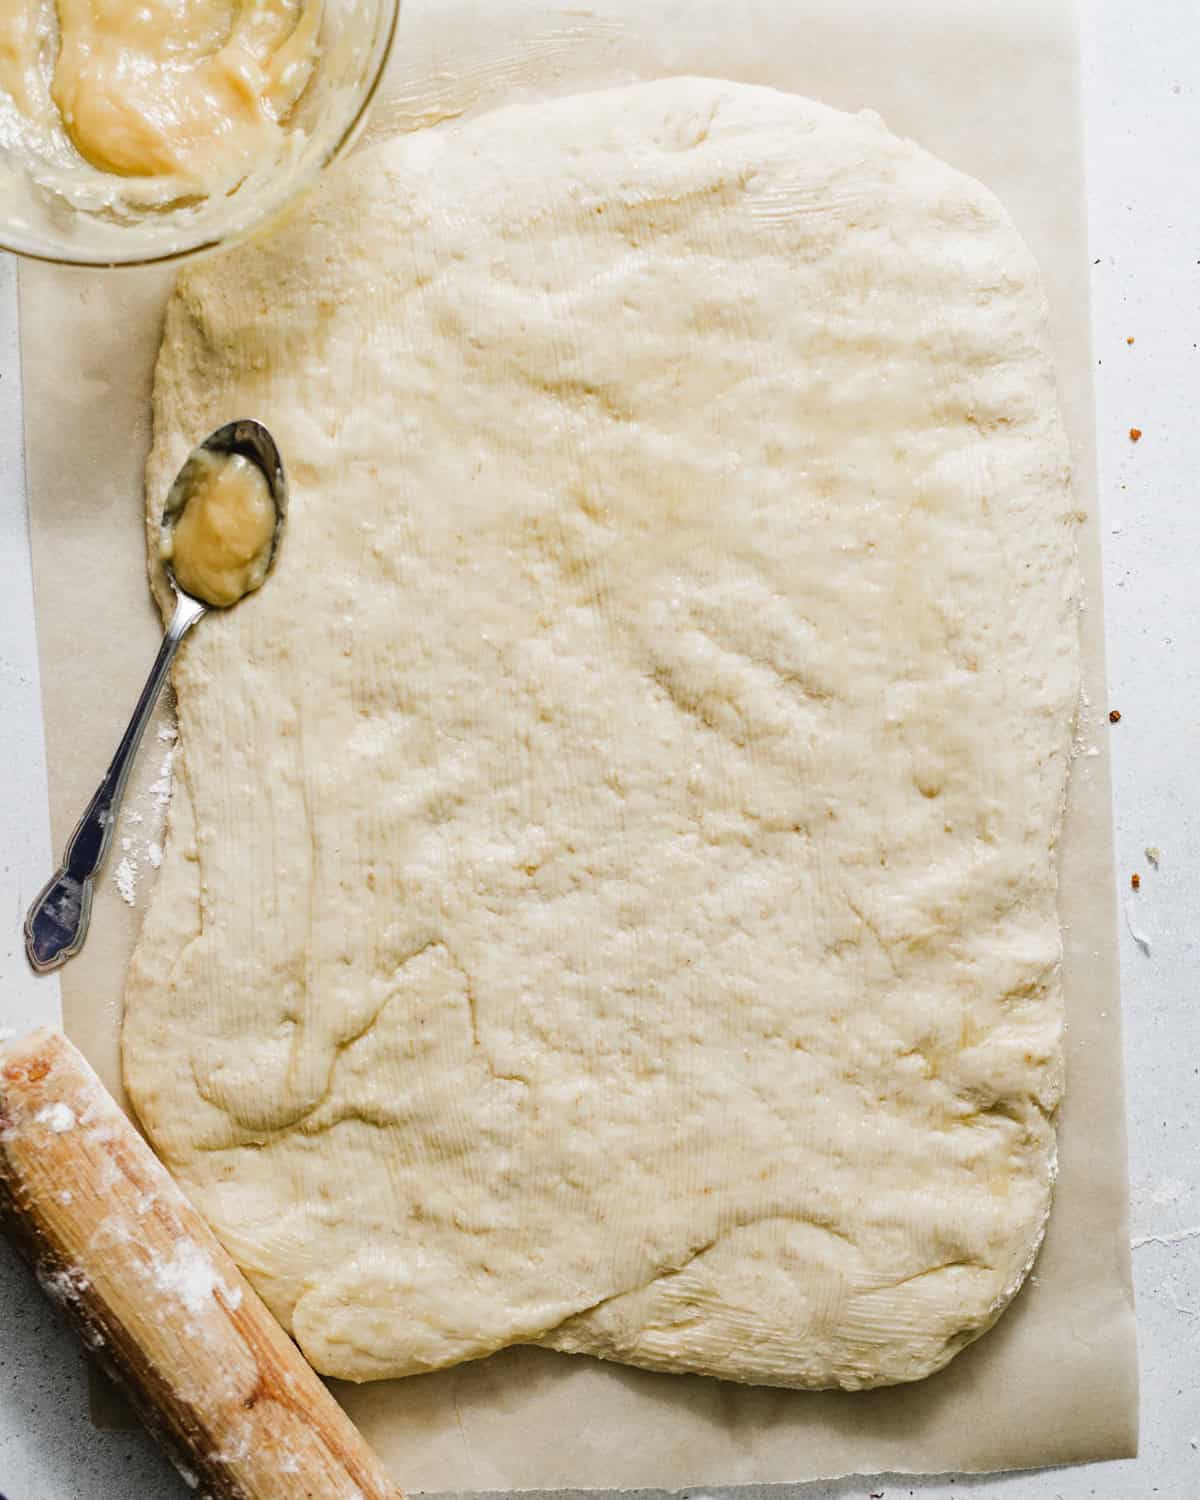
Step 3: While the dough is rising, make the honey butter by combining honey and butter in a small bowl and mixing until smooth. Once risen, punch the dough down and remove from the bowl onto a lightly floured surface. Roll into a rectangle and brush the inside of the dough with honey butter.
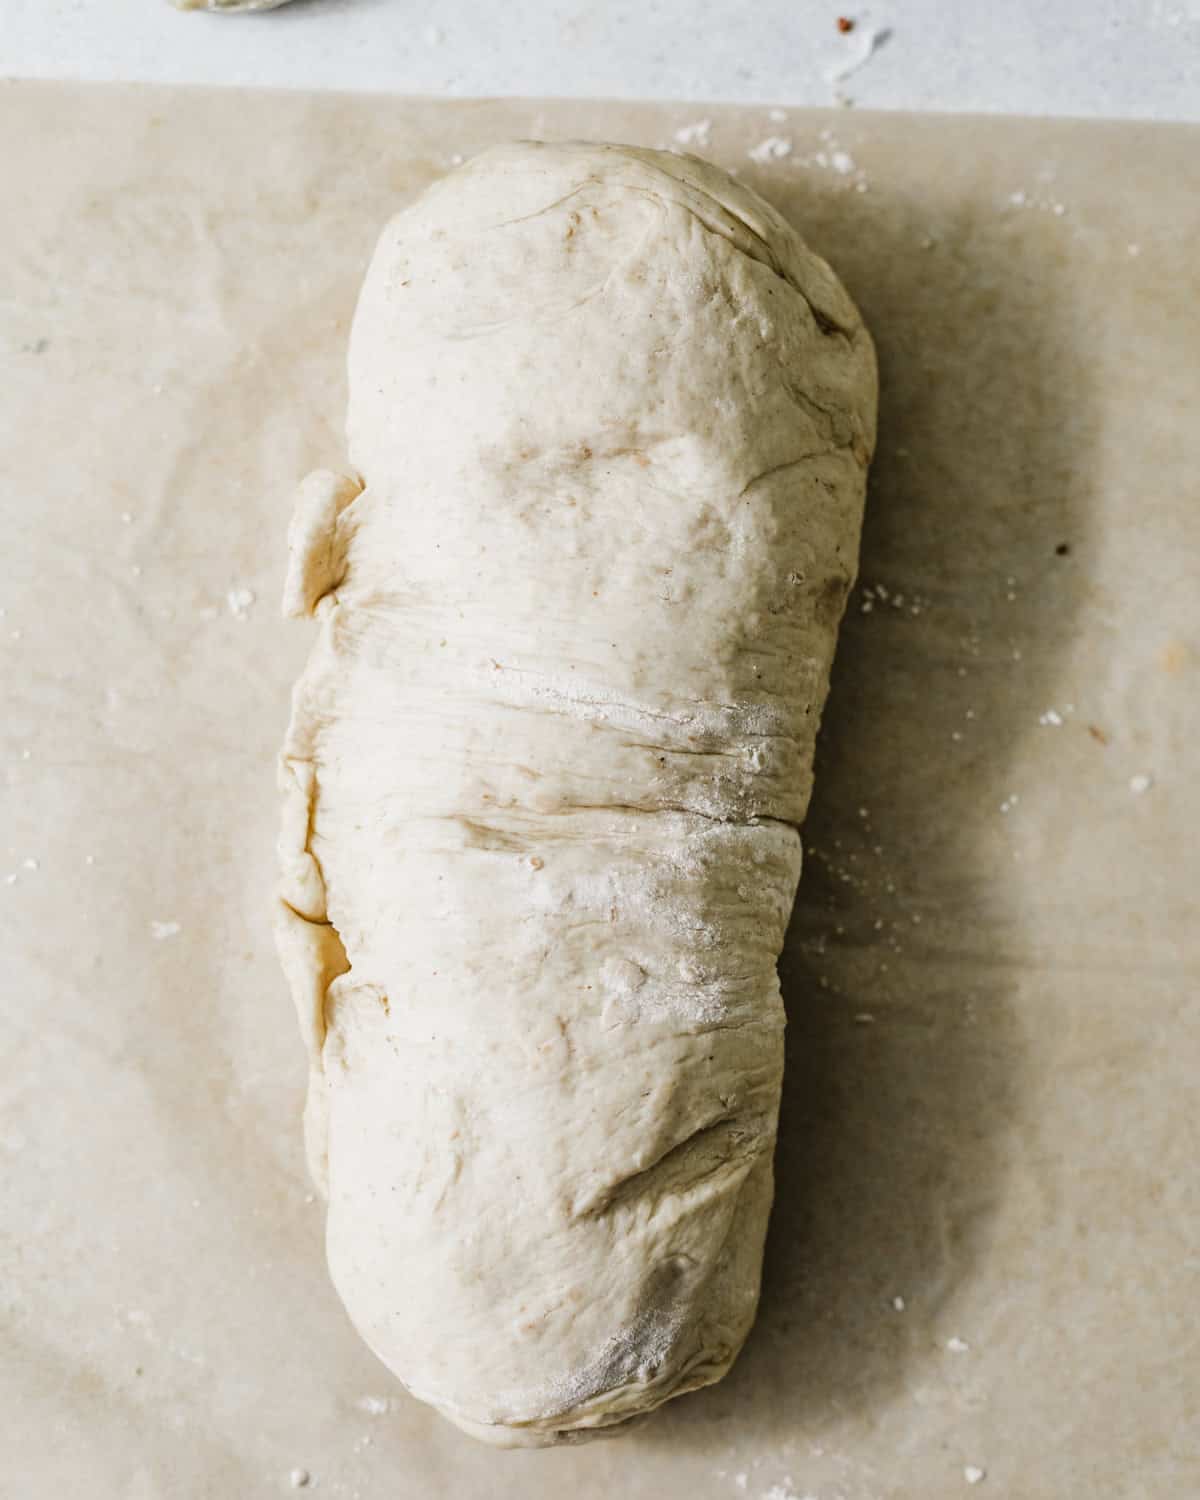
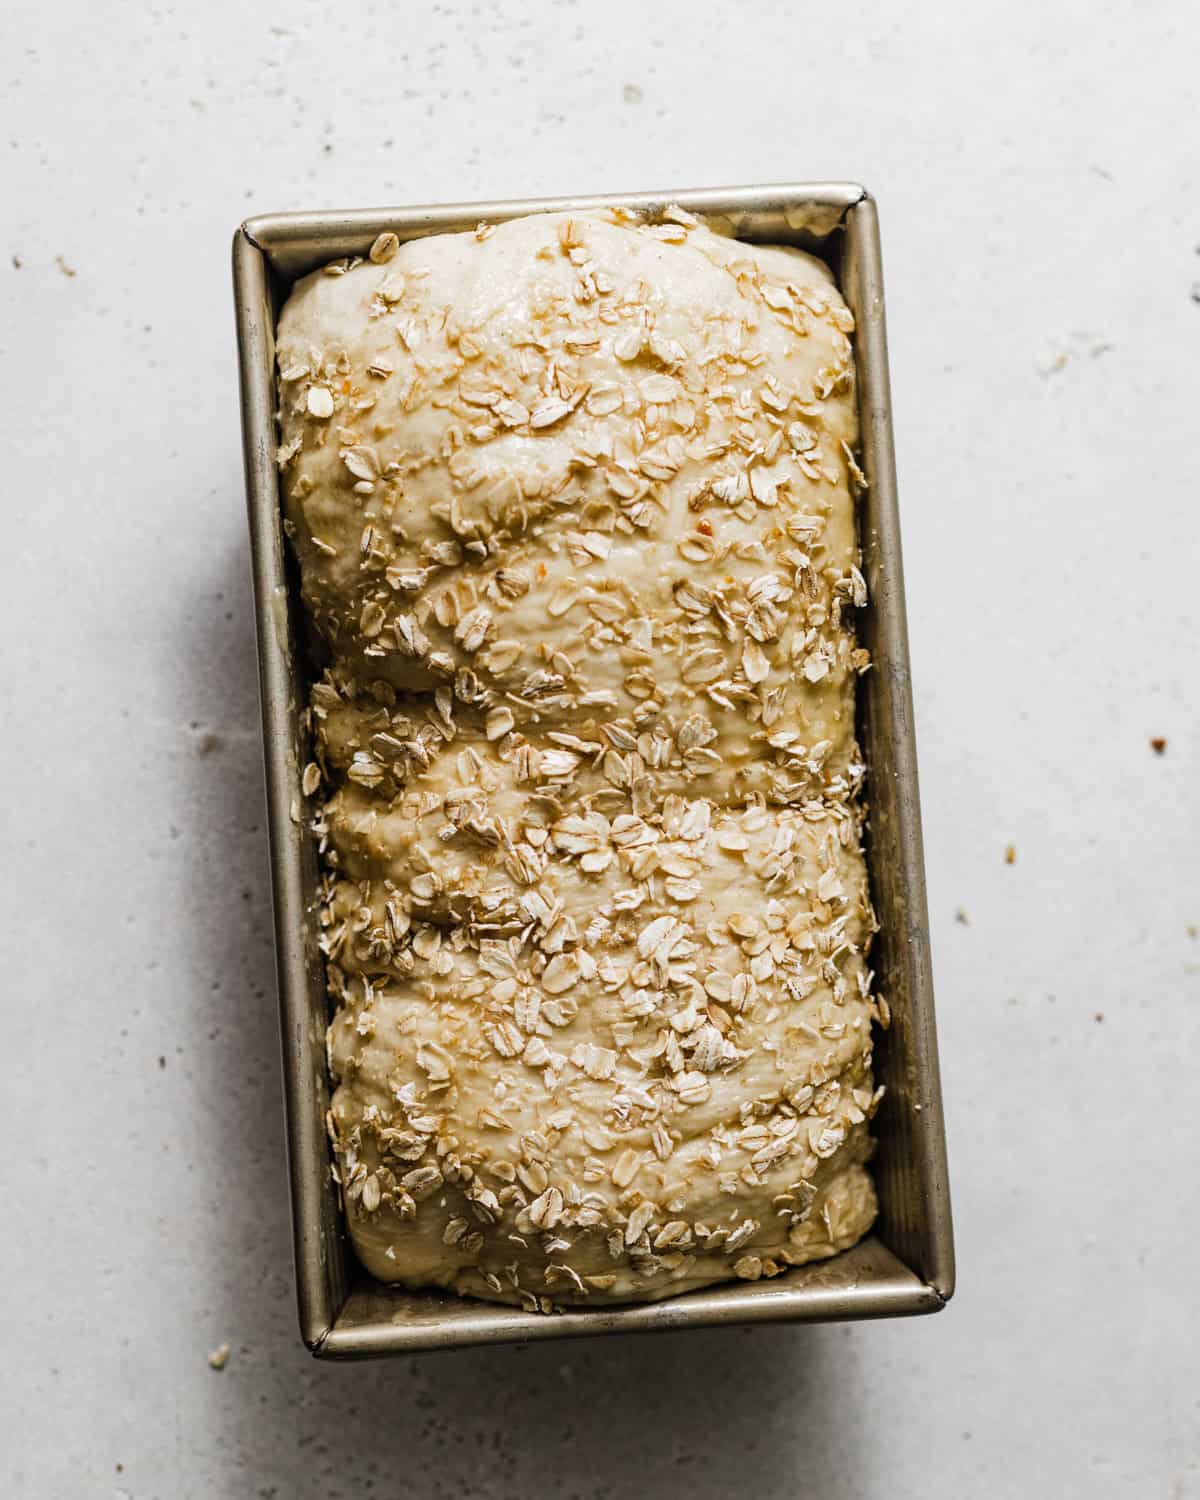
Step 4: Roll into a log and place dough into a 9 x 5-inch pan. Brush remaining honey butter on top of the dough. Sprinkle with chopped oats and let the dough rise again (second rise).
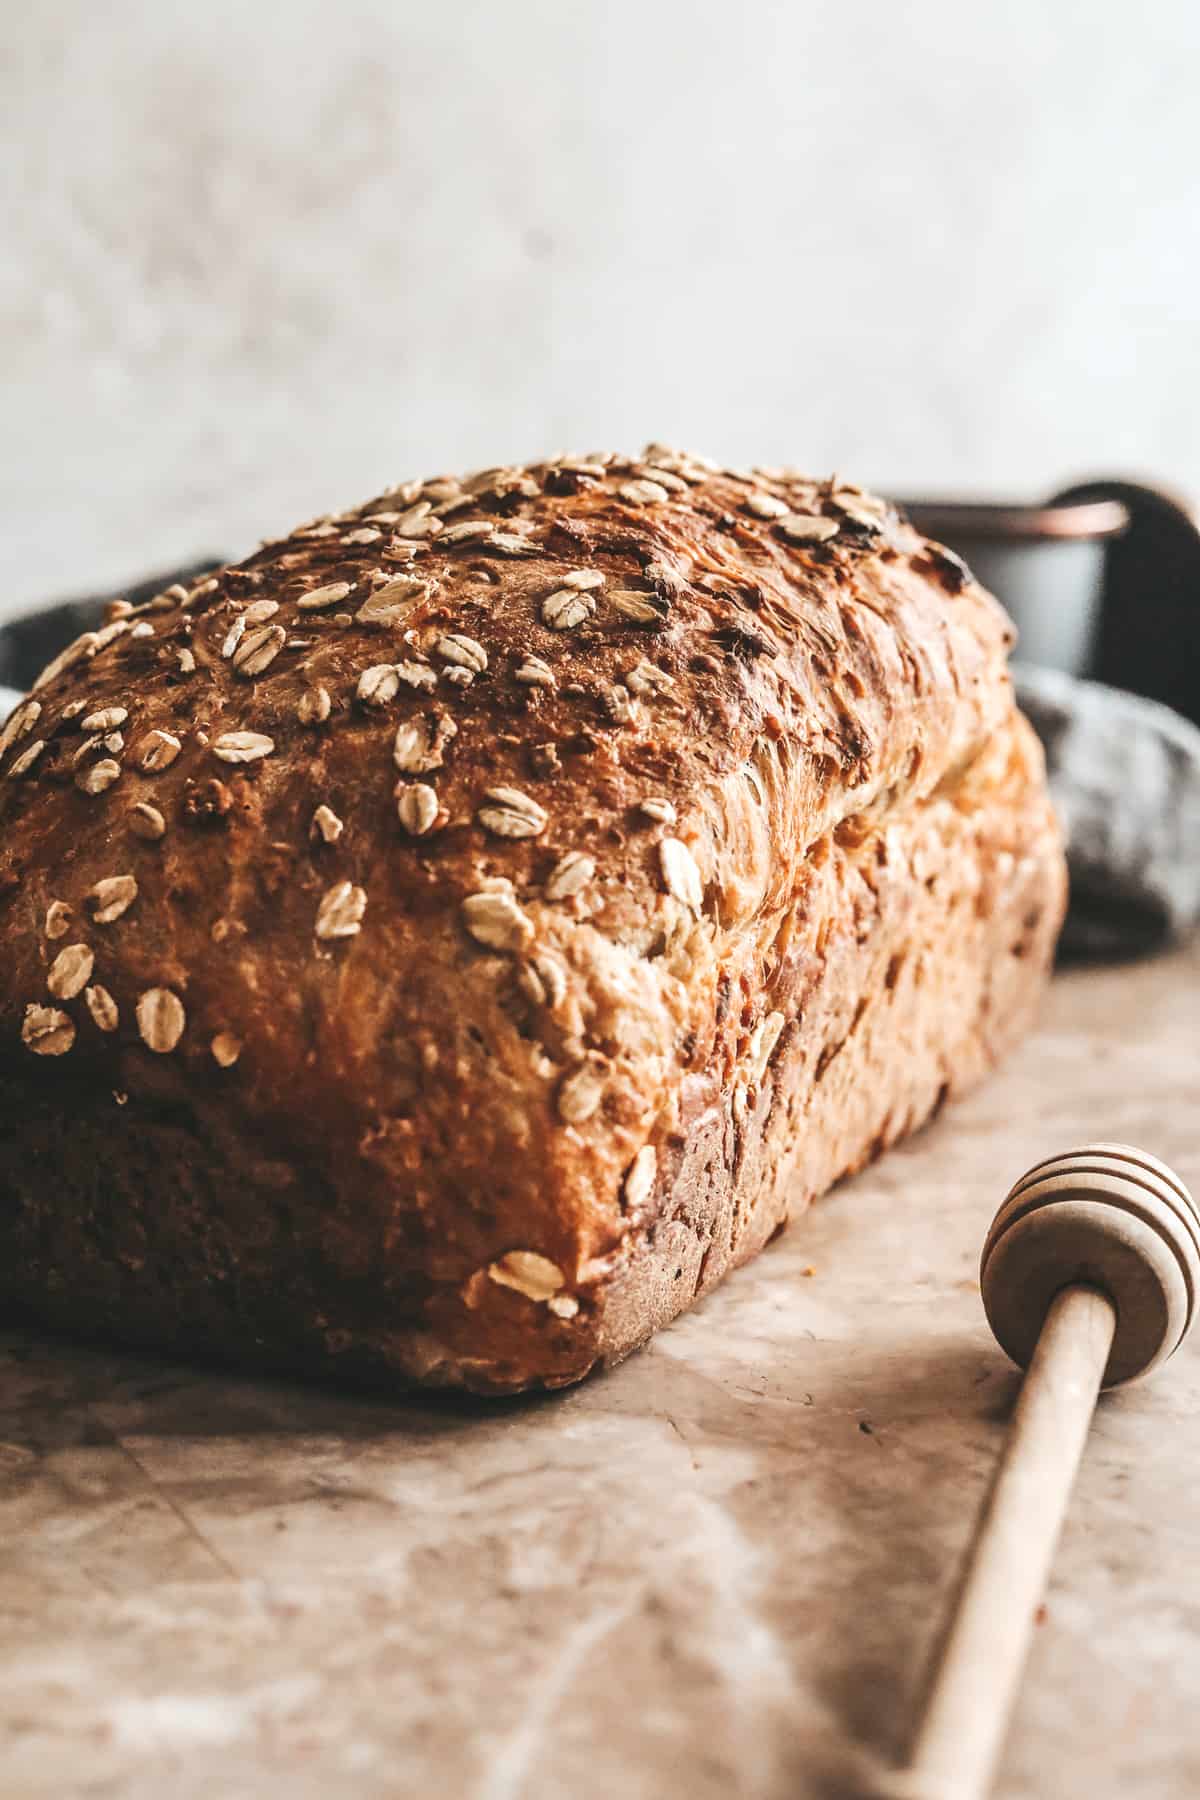
Step 5: Bake until the top is golden brown, the bread has risen, and a toothpick inserted into the center comes out clean or with a few moist crumbs. Store in an airtight container or cover with plastic wrap once cooled completely.
How to Know When Honey Oat Bread Is Done
The bread is done when the top is golden brown and the center is baked through. The bread dough will also rise while baking in the oven so it will be noticeably bigger the closer it is to being done. A toothpick inserted into the center should come out clean or with a few moist crumbs.
The top should look firm and set, not pale or doughy. If the bread is browning too quickly before the center is done, loosely tent it with foil and continue baking until fully baked.
Professional Baking Tips for the Best Honey Oat Bread
- Make sure your yeast is fresh. If the yeast mixture doesn’t foam after sitting for a few minutes, the yeast may be expired or the liquid may have been too hot or too cold.
- Let the bread rise in a warm place. This helps quicken the process. I like to turn the oven light on and place into the oven to rise. It’s the perfect temperature. Keep in mind, bread rises based on temperature, so it may take more or less time depending on your kitchen.
- Grease the loaf pan with cooking spray or a thin layer of olive oil before adding the dough to prevent the bread from sticking to the pan.
- Make sure buttermilk is room temperature. Cold buttermilk can inhibit gluten production, making it more difficult to form a cohesive dough.
- Let the bread cool completely before cutting! If you love a fluffy bread, let it cool completely on a wire rack. If cut it while hot, it smushes the bread and can make it dense.
Recipe FAQs
This recipe yields about 16 slices. Of course, this is depending on how big or small you slice the loaf/bread. I like my bread slices a bit thicker, so I cut them accordingly. Typically, I eat this bread as toast with a little butter for breakfast with my morning coffee. But! This bread also makes an exceptional ham sandwich and can be eaten with savory foods as well for a delicious sweet and savory vibe.
If you haven’t eaten it all immediately fresh out of the oven, this bread will keep for up to 5-7 days. It should be stored in a bread box or in an airtight container. You can also freeze this bread for up to three months. When it’s time to use the bread, simply toast in the oven or in a toaster right out of the freezer. IF you allow it to defrost, the bread will become soggy. Yikes! Besides, toasted bread is always yummy anyway. Just my biased opinion! 🙂
More Bread Recipes

Appetizers
Hawaiian Rolls

Appetizers
No Knead Olive Bread

Breakfast
Banana Bread with Pecans

Appetizers
Brioche Dinner Rolls
Want more delicious and beautiful recipes? Subscribe to my newsletter to receive the latest seasonal creations as soon as they’re released!
If you make this recipe, please leave a star rating on the recipe card and comment below! You can also tag @BritneyBreaksBread on Instagram and hashtag #britneybreaksbread so I can celebrate your beautiful creations!
Honey Oat Bread

Equipment
- 9×5 loaf pan
- Pastry Brush (optional)
Ingredients
- 1/3 cup (80 g) Water, (Warm)
- 2 1/4 tsp Active Dry Yeast
- 3/4 cup (180 g) Buttermilk, (room temperature)
- 1/4 cup (84 g) Honey
- 3 1/3 cups (417 g) All Purpose Flour
- 2/3 cups (56 g) Rolled Oats
- 1 1/4 tsp Kosher Salt
- 1/4 tsp Nutmeg
- 4 tbsp (56 g) Salted Butter, (room temperature)
Honey Oat Filling and Topping
- 2 tbsp (28 g) Salted Butter, (room temperature)
- 2 tbsp (42 g) Honey
- 3 tbsp Rolled Oats, (roughly chopped)
Instructions
- In a medium bowl, add warm water and active dry yeast. Stir together and allow the yeast to bloom – it'll be foamy/bubbly when ready to use, about 5-10 minutes. Stir in buttermilk and honey. Set aside. 1/3 cup Water 2 1/4 tsp Active Dry Yeast 3/4 cup Buttermilk 1/4 cup Honey
- In the bowl of a stand mixer, add flour, rolled oats, kosher salt, and nutmeg. Whisk together until combined, about 10 seconds, then pour in the yeast/buttermilk mixture. Use a rubber spatula to mix together until a shaggy dough begins to form, about 1 minute. 3 1/3 cups All Purpose Flour 2/3 cups Rolled Oats 1 1/4 tsp Kosher Salt 1/4 tsp Nutmeg
- Attach the dough hook to the stand mixer and mix on medium speed for 1-2 minutes, then add the butter, 1 tbsp at a time, ensuring each tablespoon is fully incorporated before adding more. Once all of the butter is added, increase the mixer speed to medium high and mix for 8-12 minutes, until a shiny, yet tacky dough forms and the dough is no longer sticking to the sides of the bowl. At first, the dough may pool on the bottom of the bowl, but as it mixes, it will form into a ball. 4 tbsp Salted Butter
- Dough will be tacky/slightly sticky. It's helpful to lightly dust your hands in flour before grabbing the dough from the bowl. Place the dough into a well oiled bowl. Cover with plastic wrap or a clean kitchen towel and allow the dough to rise. It's fully risen when the dough has doubled in size, about 1 to 1 1/2 hours, depending on the temperature in your home.
- While the dough is rising, make the honey butter filling and topping. Mix together room temperature butter and honey in a small bowl until fully combined and smooth. Set aside. 2 tbsp Salted Butter 2 tbsp Honey
- Chop up the rolled oats and set aside. This will get sprinkled on top of the bread before baking. 3 tbsp Rolled Oats
- Once the dough has doubled in size, punch down the dough and place the dough onto a lightly floured surface. Use a dough roller to roll the dough out into a rectangle, about 8×15 inch rectangle.
- Use a pastry brush to lightly brush a thin layer of the honey butter on top of the dough. Don't add too much, just a very thin layer! (if needed, pop into the microwave for about 5-10 seconds to melt it a little to make it easier to spread)
- Grab the short side of the dough and roll into a log.
- Grease a 9×5 loaf pan with oil and place the log into the pan. Brush the top of the bread with the remaining honey butter and sprinkle the chopped oats on top. Allow it to rise again for about another 30-45 minutes, until it's puffy and risen about 1 inch above the rim of the pan. This will vary depending on the temperature of your home.
- Preheat the oven to 350°F. Bake the bread on the middle rack for 45 minutes to 1 hour. When done, the top will be golden brown and a toothpick inserted into the center of the loaf comes out clean (press all the way to the bottom). Tip: If your top oven rack sits close to the middle rack, remove it before baking so the bread has room to rise without touching the rack.
- Allow bread to cool in the loaf pan for 20 minutes, then remove and place onto a wire rack completely before cutting into it.
Nutrition
Nutrition information is automatically calculated, so should only be used as an approximation.


Hi there,
What size loaf pan do you recommend? Thanks!
Hi Christy! I recommend using a 9×5 loaf pan!
Thank you!
This bread was so easy to make and the directions were straight forward. I usually am wary to make a bread, but this recipe made me want to always make my own bread! I look forward to enjoying it and making more.
I’m so happy that you love this recipe, thanks so much for your review!!
Made this today, and it looks and smells amazing! It’s cooling now…can’t wait to slice it!
Thanks so much for this feedback, I hope that you love this recipe as much as we do!
This recipe looks absolutely delicious! I want to substitute my wild yeast instead of using packaged yeast. How much should I use? Thanks
Thank you! I’ve never used wild yeast before but here’s an article I found on google that may help: https://www.cooksillustrated.com/how_tos/6620-yeast-types
This may be a dumb question but what is bread flour. Is it a mixture of different flours? I’m new to gluten free baking and have only used the 1 for 1 so far. Will that work in this recipe? If not please give me direction. Thanks
Hi Jeanne! This isn’t a gluten free recipe, but bread flour is a flour with a higher protein content and is excellent for making bread and other baked goods. Here’s the link to bread flour (https://www.target.com/p/king-arthur-flour-unbleached-bread-flour-5lbs/-/A-14777576?ref=tgt_adv_XS000000&AFID=google_pla_df&fndsrc=tgtao&DFA=71700000012510691&CPNG=PLA_Grocery%2BShopping&adgroup=SC_Grocery&LID=700000001170770pgs&LNM=PRODUCT_GROUP&network=g&device=c&location=9007779&targetid=aud-554348707659:pla-776278239556&ds_rl=1246978&ds_rl=1248099&gclid=CjwKCAiAxeX_BRASEiwAc1QdkX6FKXw2f4vPOdmSTvK4nHPF-5fFNXhXpmNObvFuthwd5gNg8EVxmhoCLM4QAvD_BwE&gclsrc=aw.ds), you can typically find this in your grocery store next to the all purpose flour. I hope that this helps!
This bread was to live for!!! So easy to make, and even easier to EAT!!!
It was supposed to be for weekend breakfast but it didn’t even last that long!! We slapped some honey strawberry butter on that bread annnnd giiirrll lol the kids were quite (Amen) and full of butter.
Me and my husband had to hide two thick slices so we could eat them as a toasty warm late night snack! ????
Thank you, Britney for such delicious recipes!
I loved the recipe! I made it with a little tweak used whole wheat bread flour. It’s delicious, I love the crumb, it cooked through and through.
Enjoying it with my home made orange curd.
Honey Oat Bread with homemade orange curd sounds amazing! I’m so happy that you enjoyed it!
Britney this recipe was AMAZING! My kids and I are currently eating this bread with a little butter and watching movies. They love it, I love it. It’s phenomenal!
Hi Alex! I’m so happy to hear this, thank you for your review!
Hi there! I made this beautiful bread today and it looked great, tasted delicious but was really heavy and very dense. Any suggestions on what I did wrong?? Question about the second step. I thought that salt kills yeast if they directly touch. Do I add them at the same time? Thanks for your help!
Hi Tracie! I’m glad that the bread tasted great. Salt doesn’t kill yeast, it simply slows the growth of it. A ton of salt can kill the yeast but not the portions used in this recipe. Your bread may have been a bit denser if it didn’t get very bubbly. In the winter, if your house is cooler, you’ll need to give the bread more time to rise and then bake afterward. I hope that this helps and thanks for trying my recipe!
Thank you so much for replying!! I’m gonna try again. Too good not to!
Made this today following all instructions. While the bread tastes good and has a nice crumb, I was unable to get it out of the loaf pan. When I finally did, half of the loaf was stuck in the pan. Sorry, I don’t think I’ll make this again ????
Hi Lori! Sorry that the recipe didn’t work for you. Did you spray the loaf pan with oil prior to adding the dough? I’m glad that you liked the crumb and that it tasted good, it’s a favorite of ours in my household! Also, if the loaf is sticking to the pan, it’s important to use a knife to unhinge it first before pulling it out of the loaf pan. Also, it could be the type of loaf pan that you used, maybe next time try parchment paper too!