This post may contain affiliate links. Please see our disclosure policy.
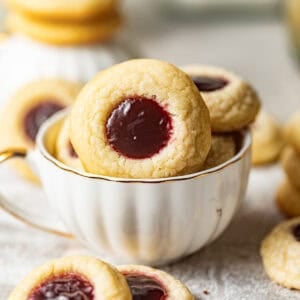
These raspberry thumbprint cookies are buttery, tender, and filled with sweet and tart raspberry jam. They’re easy to make and so delicious, you won’t be able to eat just one!
For more tasty cookie recipes, make my bakery style chocolate chip cookies and chewy peanut butter cookies!

These raspberry thumbprint cookies are one of those simple recipes that never gets old. My husband said that this is one of my best cookie recipes yet.
They’re buttery, soft, and filled with sweet raspberry jam that pulls all of the flavors together.
The dough comes together quickly and bakes up tender with just a hint of almond and vanilla in every bite. The jam center adds the perfect pop of flavor without making the cookies overly sweet.
They also happen to look way fancier than the effort it takes to make them, which is always a win.
These jam thumbprints are the kind of cookies that are perfect during the holiday season, but also go exceptionally with a cup of coffee on a regular afternoon.
No special skills required, just good ingredients and a little time in the kitchen.
Table of Contents
Why You’ll Love These Thumbprint Cookies!
- Buttery, melt-in-your-mouth texture! These cookies have a soft buttery cookie base that’s rich and tender with that classic shortbread cookies texture, similar to my almond shortbread cookies.
- They look fancy without trying! Thumbprint cookies always look labor intensive but in actuality, it’s a super easy recipe that’s a lot of fun to make!
- Crowd-pleasing classic! These disappear fast at parties, showers, and cookie swaps, promise.
- Customizable! Swap in apricot, strawberry, chocolate, or lemon curd and make it your own.
Key Ingredients

(full list of ingredients can be found in the recipe card)
- Salted butter creates that tender texture and balances sweetness with just the right touch of salt.
- Powdered sugar dissolves quickly for a smooth dough and gives the cookies a soft, delicate, shortbread-style crumb with less spreading.
- Egg yolk adds richness and helps bind the dough without making the cookies dry, keeping the centers soft and luscious. Save your egg whites and make my meringue cookies next.
- Vanilla and almond extract – Vanilla brings warmth and depth, while almond extract adds that subtle bakery-style flavor that makes these cookies extra special.
- All-purpose flour gives structure so the cookies hold their shape while still staying tender and light.
- Raspberry jam or preserves adds a sweet-tart burst of flavor in the center of the cookies!
Substitutions and Variations
- If you prefer to use unsalted butter, please feel free to do so! Just add 3/4 tsp of kosher salt as opposed to 1/2 tsp when making this adjustment.
- Use a different filling: I love using raspberry preserves or jam, but you can really use any kind of jam you’d like. Apricot jam, fig jam, orange marmalade, lemon curd, and strawberry jam are all great alternatives!
- Add in some lemon zest for a little citrus flavor.
- I use powder sugar in this recipe because it has cornstarch that helps keep the cookies soft and prevent them from cracking and spreading too much while baking. If you only have granulated sugar, you can use it (I recommend 1/2 cup sugar) and add in 3 tbsp cornstarch.
How To Make Raspberry Thumbprint Cookies

Step 1: In the bowl of a stand mixer fitted with the paddle attachment, add room temperature butter and confectioners’ sugar. Cream together for 3 minutes on medium speed. Scrape down the sides of the bowl and add in the egg yolk, vanilla extract, almond extract and continue to mix until just combined, about 30 seconds.
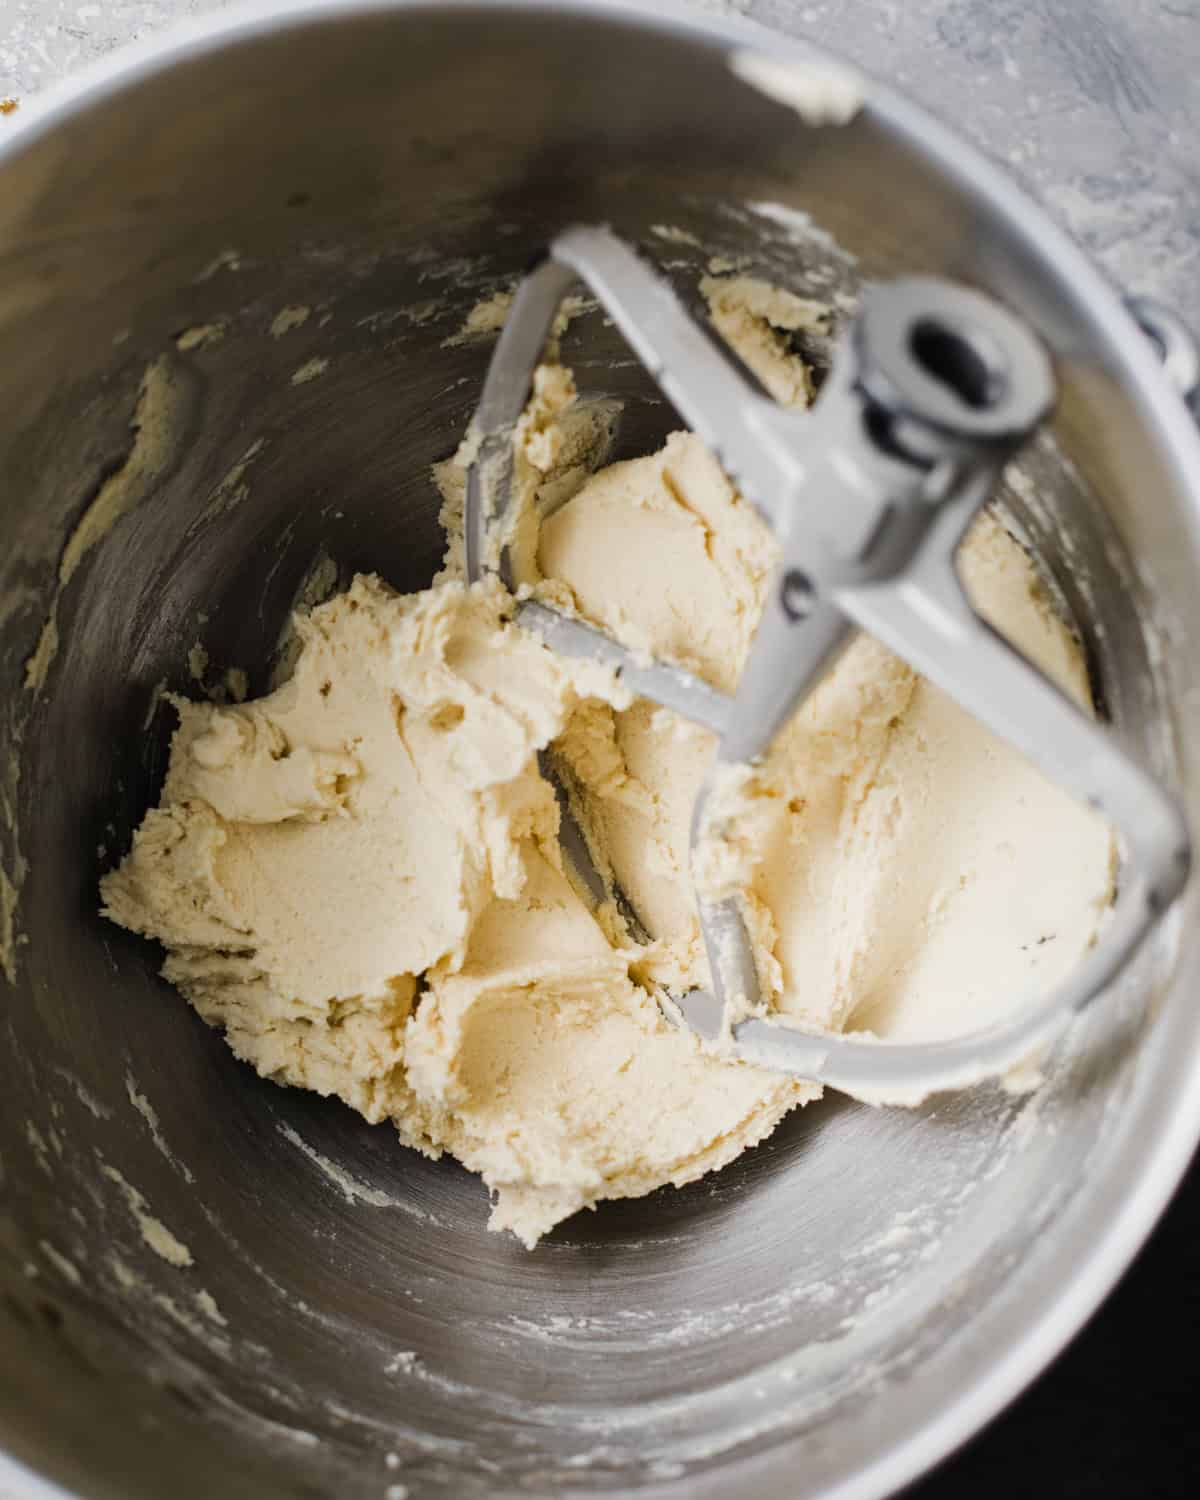
Step 2: Add in the dry ingredients – all purpose flour and kosher salt and mix until combined and a dough forms, about 30 seconds.
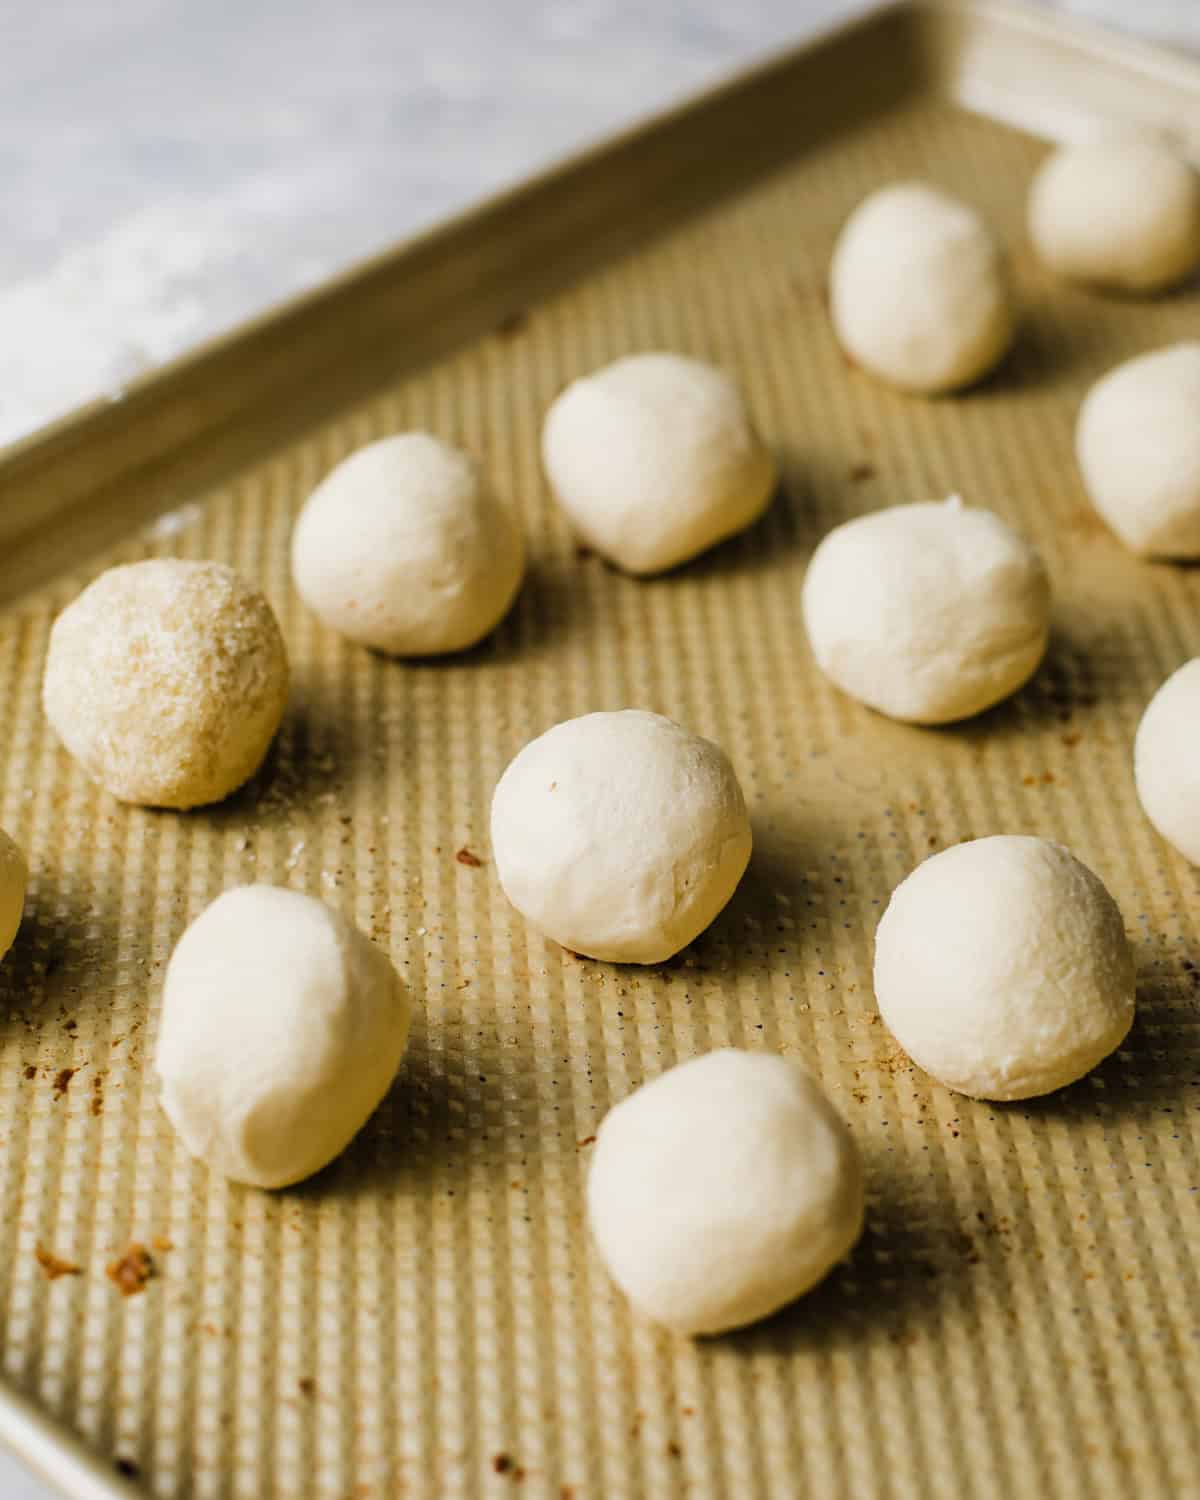
Step 3: Line a cookie sheet with parchment paper. Scoop out 1 tbsp of the cookie dough and roll into a smooth ball. Place onto the prepared baking sheet. Cover with plastic wrap and freeze for 30 minutes. Preheat the 375 degrees F. Pour a 1/2 cup of sugar into a small bowl. Roll each cookie in the sugar, then place onto the cookie sheet. Space cookie dough balls about 2 inches apart (I used 2 cookie sheets) and bake for 12-14 minutes, until the edges are golden brown and the centers are puffy.

Step 4: Fresh out of the oven, use the bottom of a rounded bottom of a teaspoon to press a small circle into the center of each cookie. Allow the cookies to cool on the baking sheet for about 10 minutes.
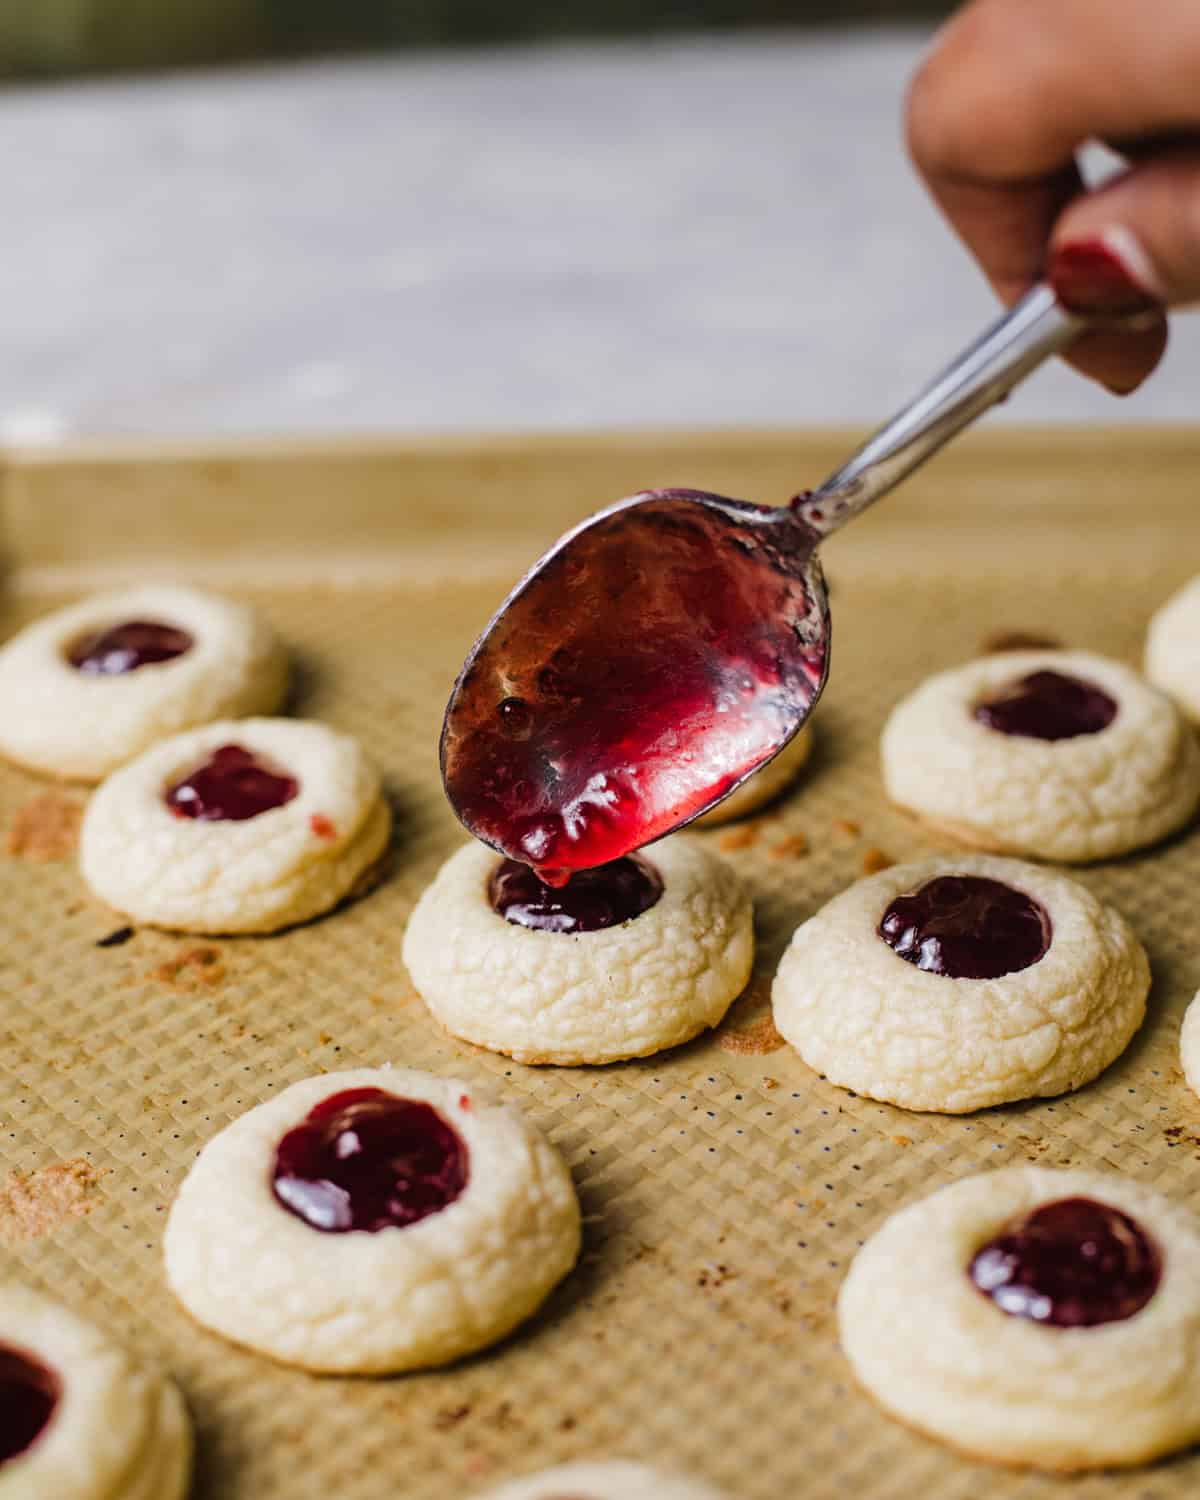
Step 5: Add the raspberry jam to a small bowl and pop into the microwave for about 10-15 seconds (this makes it easier to pour into the cookies). Pour about 1 tsp of the raspberry jam into the center of the cookie. Place onto a wire rack and allow them to cool completely to set.
Pro Baking Tips for the Best Raspberry Thumbprints
Don’t press too deep. You want a well, not a crater. Too deep and jam filling will leak out of the bottom.
Use room temperature butter! Too cold and your dough won’t cream properly, too soft and your cookies will spread like gossip.
For best results, weigh your flour if you can. Too much or too little flour can make or break this cookie recipe. I provide the gram measurements in the recipe card so that you can measure the ingredients with a kitchen scale.
To prevent cracks in the cookies, press them while they’re still warm.
Use the right tool: the back of a teaspoon or rounded measuring spoon is perfect for those neat, bakery-style wells. Because you make the prints after they’re baked, I don’t recommend using your thumb as the cookies will be hot.
Recipe FAQs
This usually means your butter was too soft or warm. Be sure to freeze the dough for 30 minutes before baking to help the cookies hold their shape.
You should fill the cookies after baking! Filling after baking keeps the jam brighter and fresher in flavor.
Yes! Shape the cookies, freeze them unfilled, then bake straight from frozen, just add a minute or two to the bake time.
About halfway down the dough ball. Too shallow and the jam won’t stay put, too deep and you risk breaking through the bottom.
Cracking happens when the dough is too cold or dry. Let it sit at room temperature for a few minutes, then press gently and smooth any cracks with your fingers.
More Cookie Recipes


Want more delicious and beautiful recipes? Subscribe to my newsletter to receive the latest seasonal creations as soon as they’re released!
If you make this recipe, please leave a star rating on the recipe card and comment below! You can also tag @BritneyBreaksBread on Instagram and hashtag #britneybreaksbread so I can celebrate your beautiful creations!
Raspberry Thumbprint Cookies
Equipment
- Stand Mixer or Electric Hand Mixer
- Baking Sheets
- 1 tsp Measuring Spoon or Spoon with Rounded Bottom (for pressing into the cookie)
- 1 tbsp Measuring Spoon for Scooping the dough
Ingredients
- 1 cup (226 g) Salted Butter
- 1 1/4 cups (160 g) Powdered Sugar
- 1 Egg Yolk
- 1 1/2 tsp Vanilla Extract
- 1/4 tsp Almond Extract
- 2 1/4 cups (281 g) All Purpose Flour
- 1/2 tsp Kosher Salt
- 3/4 cup (255 g) Raspberry Jam , (or preserves)
Instructions
- In the bowl of a stand mixer fitted with the paddle attachment, add room temperature butter and confectioners' sugar. Cream together for 3 minutes on medium speed. Scrape down the sides of the bowl and add in the egg yolk, vanilla extract, almond extract and continue to mix until just combined, about 30 seconds. 1 cup Salted Butter 1 1/4 cups Powdered Sugar 1 Egg Yolk 1 1/2 tsp Vanilla Extract 1/4 tsp Almond Extract
- Add in the dry ingredients – all purpose flour and kosher salt and mix until combined and a dough forms, about 30 seconds. 2 1/4 cups All Purpose Flour 1/2 tsp Kosher Salt
- Line a cookie sheet with parchment paper. Scoop out 1 tbsp of the cookie dough and roll into a smooth ball. Place onto the prepared baking sheet. Cover with plastic wrap and freeze for 30 minutes.
- Preheat the 375 degrees F. Pour a 1/2 cup of sugar into a small bowl. Roll each cookie in the sugar, then place onto the cookie sheet. Space cookie dough balls about 2 inches apart (I used 2 cookie sheets) and bake for 12-14 minutes, until the edges are golden brown and the centers are puffy.
- Fresh out of the oven, use the bottom of a rounded bottom of a teaspoon to press a small circle into the center of each cookie. Allow the cookies to cool on the baking sheet for about 10 minutes.
- Add the raspberry jam to a small bowl and pop into the microwave for about 10-15 seconds (this makes it easier to pour into the cookies). Pour about 1 tsp of the raspberry jam into the center of the cookie. Place onto a wire rack and allow them to cool completely to set. 3/4 cup Raspberry Jam
Notes
- Use room temperature butter! Too cold and your dough won’t cream properly, too soft and your cookies will spread like gossip.
- For best results, weigh your flour if you can. Too much or too little flour can make or break this cookie recipe. I provide the gram measurements in the recipe card so that you can measure the ingredients with a kitchen scale.
- To prevent cracks in the cookies, press them while they’re still warm.
- Use the right tool: the back of a teaspoon or rounded measuring spoon is perfect for those neat, bakery-style wells. Because you make the prints after they’re baked, I don’t recommend using your thumb as the cookies will be hot.
- Don’t press too deep. You want a well, not a crater. Too deep and jam filling will leak out of the bottom.
Nutrition
Nutrition information is automatically calculated, so should only be used as an approximation.